Connections
The Connections part of the upload process is used to identify relationships to external system(s) or other related content in DBL to improve discoverability. The page looks like this:
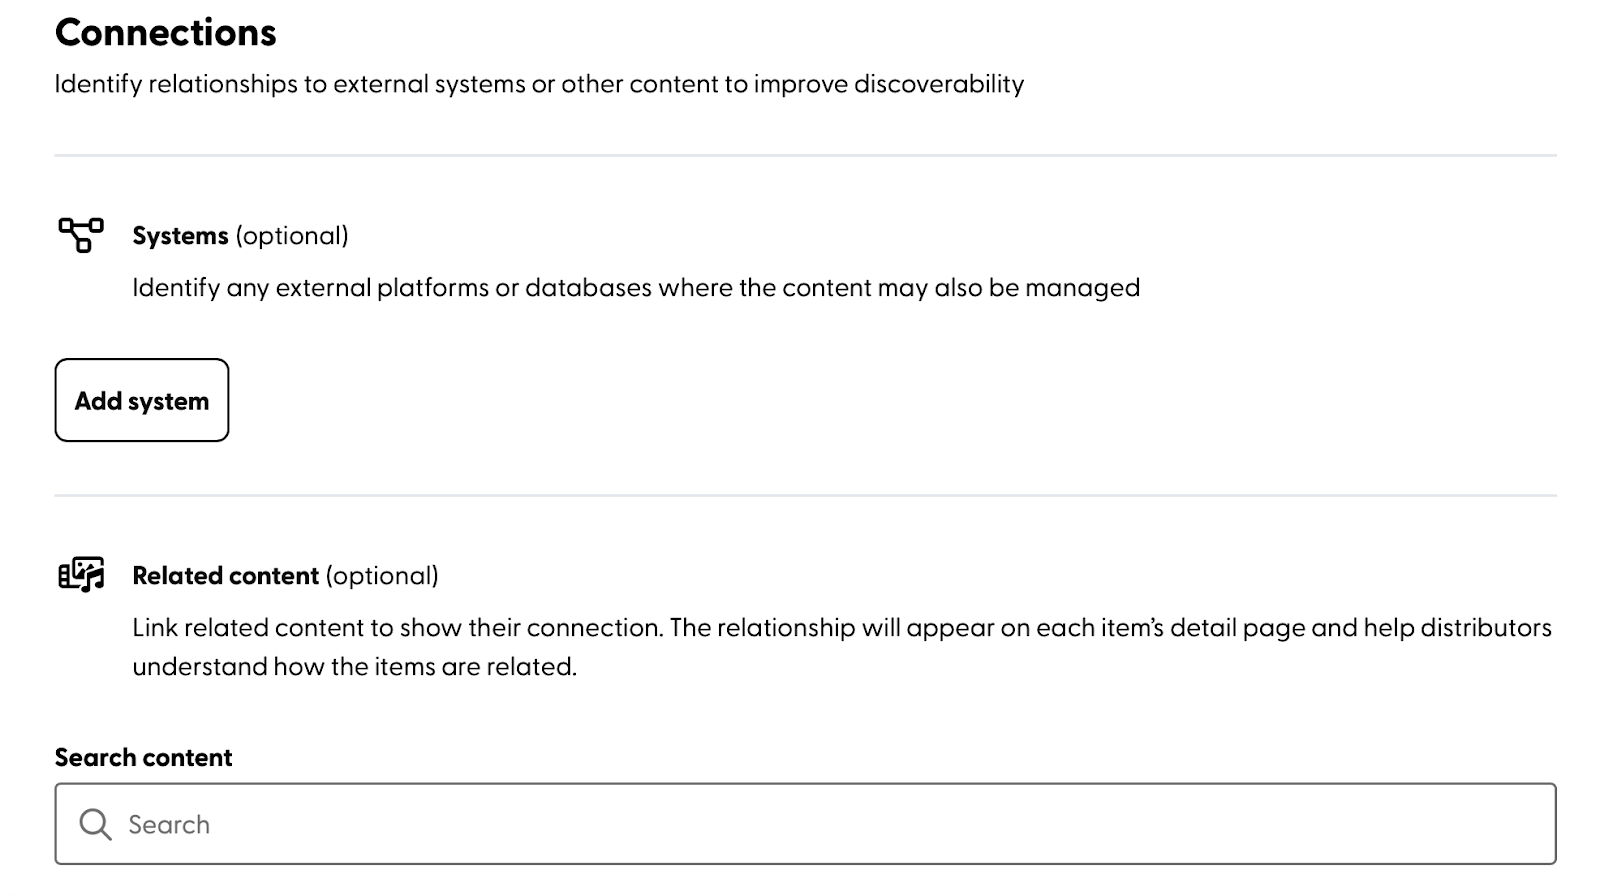
Systems
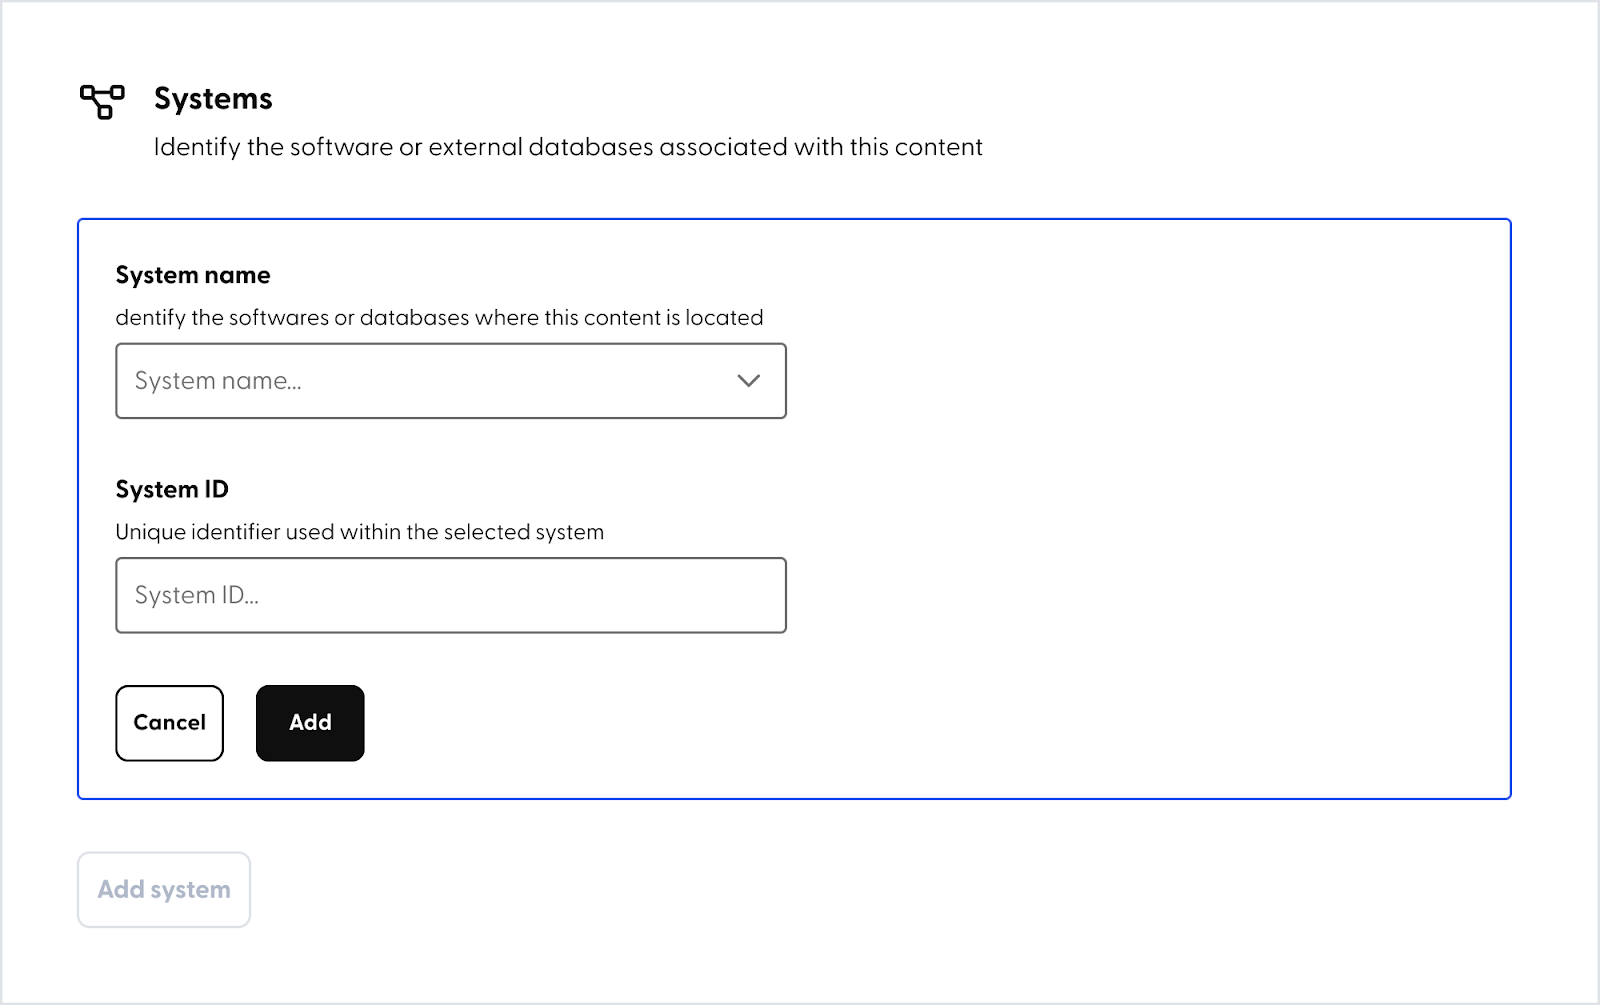
Click on the ‘Add system‘ button, the screen will prompt you to enter information for the external software or database that is associated with this content.
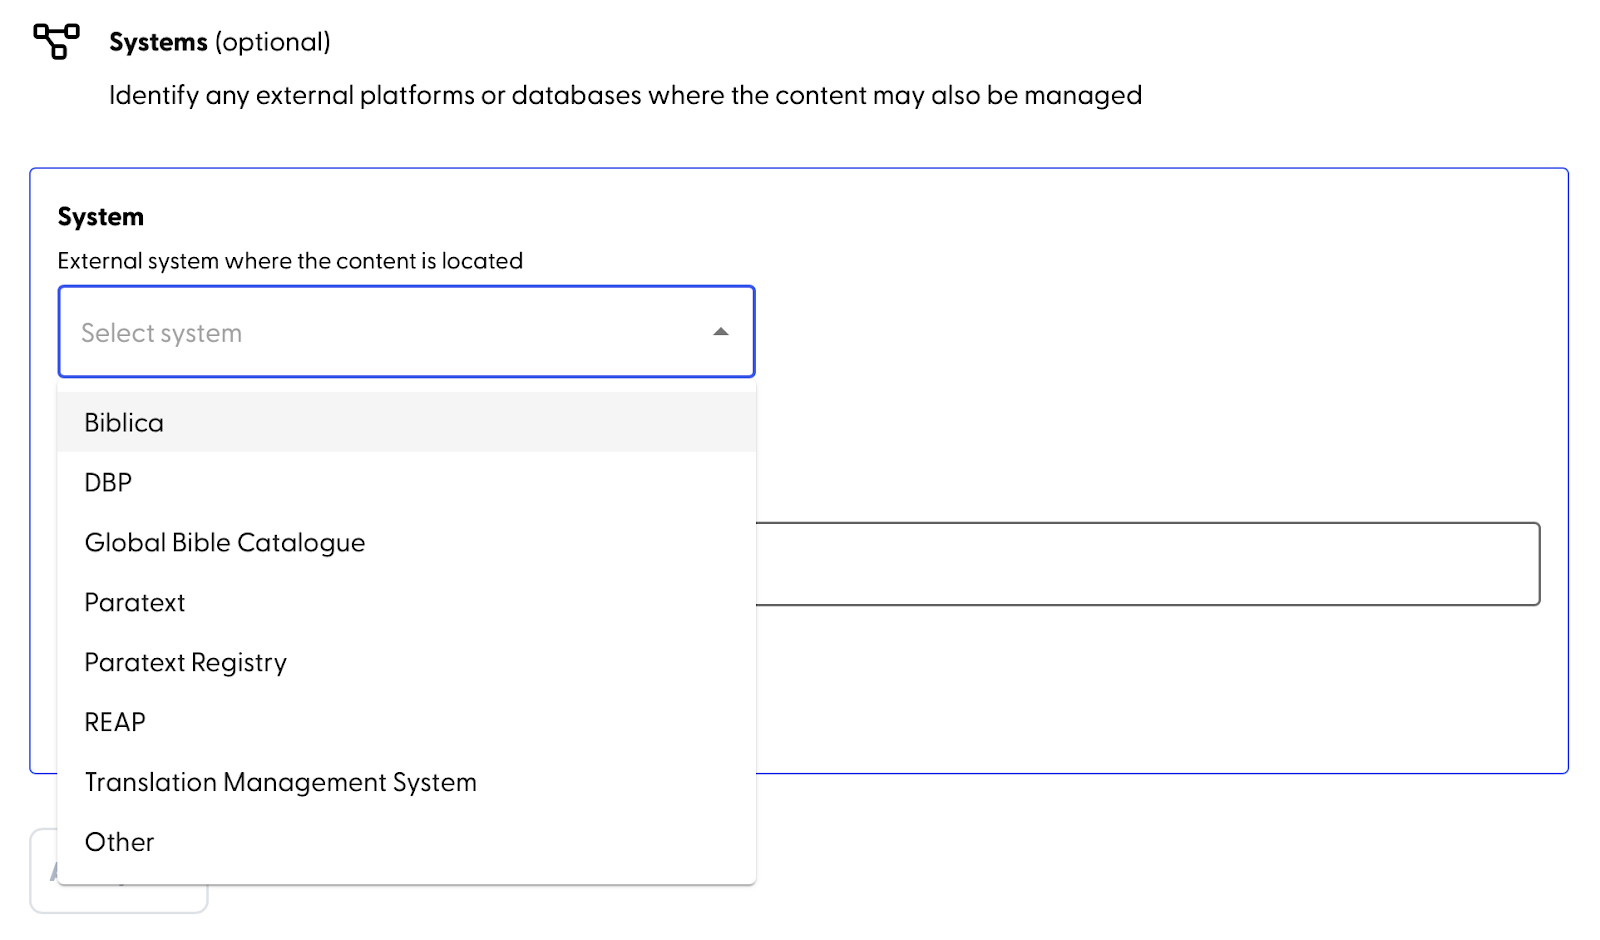
In the selection menu for System name, choose one in the drop-down list or select ‘Other’ to enter an external system name not listed.
Then, enter a System ID or unique identifier that is used by the system being connected. DBL will validate if the ID entered in this required field has an acceptable value.
Click ‘Add’ to save the info. More than one external system may be added.
Related content
Connect other related content items in DBL to make them more discoverable. The relationship will appear on each item’s detail page and help distributors understand how the items are related.
Under the section titled ‘Search content,’ start typing in the search bar and matching results will be automatically listed. Click on the content item that you want to add as a related item.
If the related content item you’ve selected is either text or video, DBL will automatically set the relationship type.
- When the selected related content is text format, the related content item is always considered the source of the uploaded content item.
- When the selected related content is video format, the related content item is always considered the expression of the uploaded content item.
If the selected related content item is audio, you’ll choose the relationship type from one of these options (as shown below):
- the content being uploaded is derived from the related item, or
- the related item is derived from the content being uploaded.
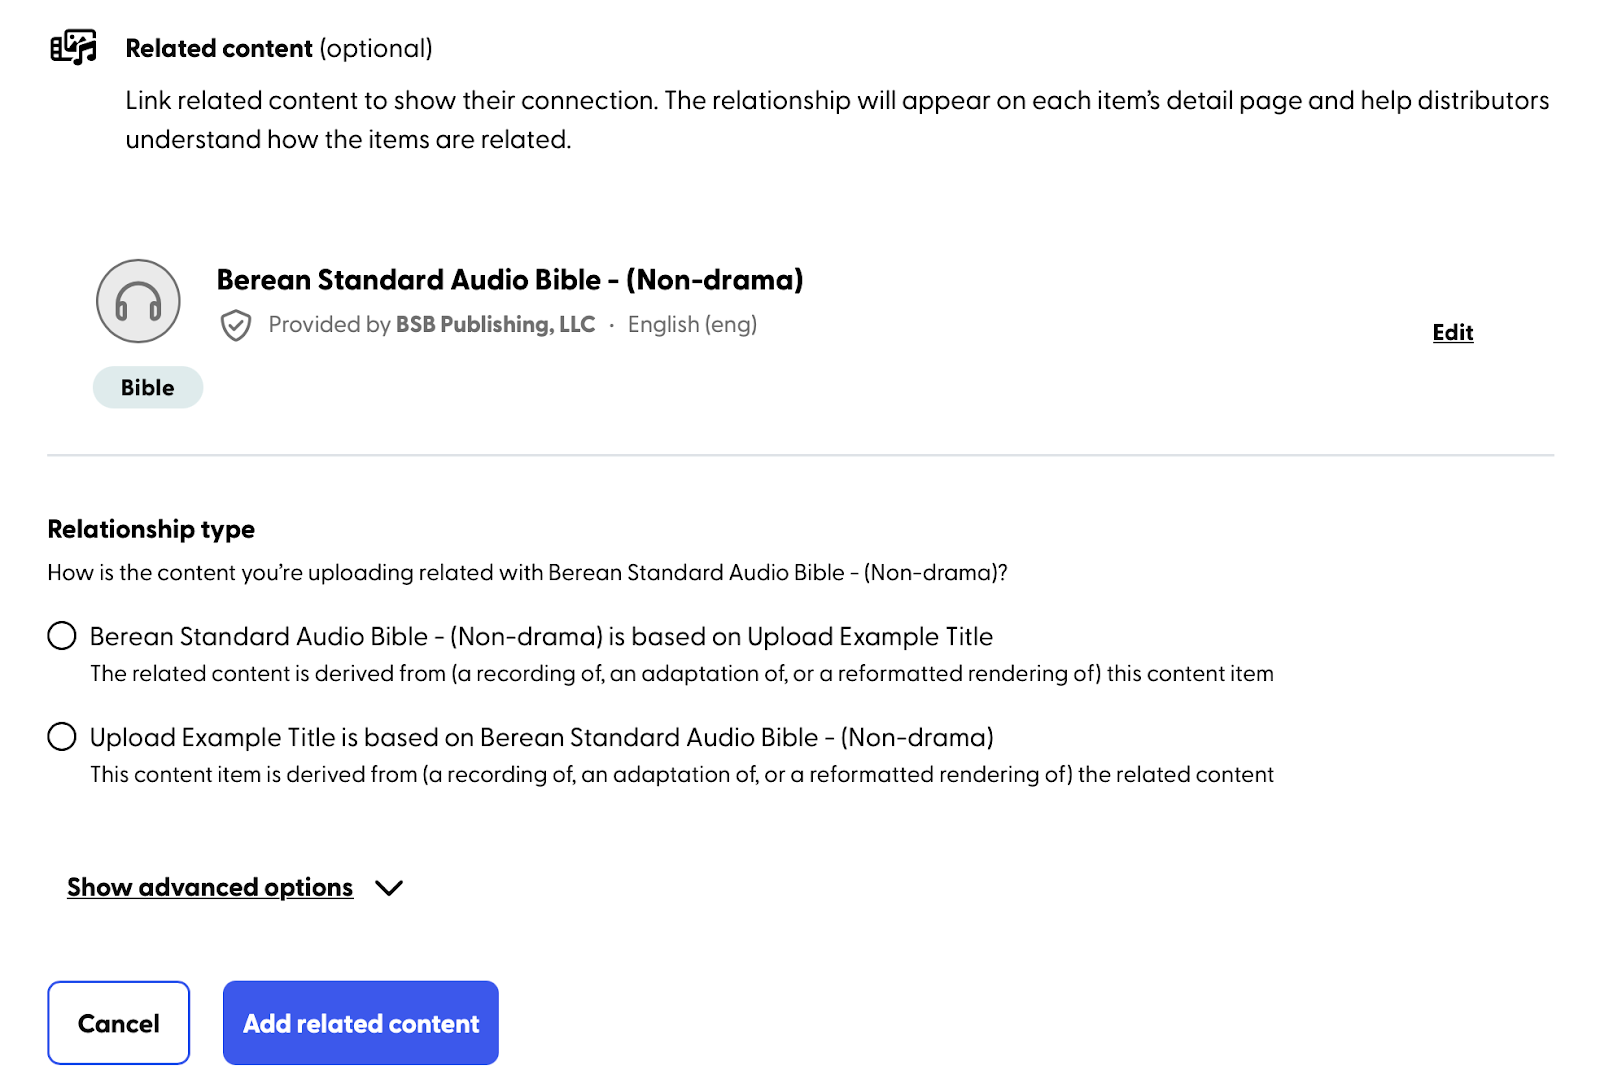
Optionally, click on the ‘Show advanced options’ link to enter a revision number for this content item being uploaded.
Click on the ‘Add related content’ button to save a selected related content item. More than one related content item may be added.
When you're ready to continue, click 'Save and Continue' to move on to the next part: Visibility.